A Graduation Quilt, Some 4th of July Projects and a Free Tutorial
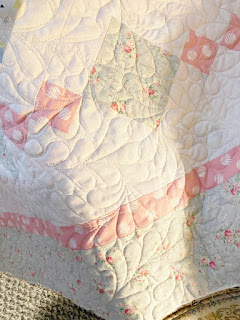
I want to share with you the quilt I made for my son's niece for her high school graduation. It was so out of my box! The pattern and the fabrics were not something I would have chosen for myself, but it was so good for me to experience something different. I have to admit I struggled at first, but as I worked on it, I found myself really enjoying the pink color. I have always liked pink but just never seemed to be able to work it into my color scheme in my home. (Except for when my daughter was a little girl, her room was in pink). Here is the finished quilt and I am really pleased with how it turned out. The quilter did a really beautiful job of picking out the perfect quilting pattern.
The name of this pattern is 'Chandelier'
I learned about it from a Missouri Star Quilt Co video.
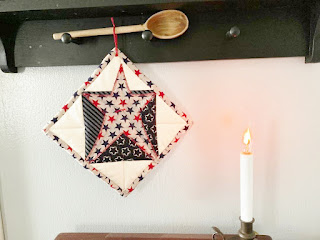
The 4th of July will be here very soon, so I thought I would try and come up with a few items for my Etsy shop. fabraholic4.etsy.com, I made a couple of hot pad holders, a star swag, four mug rugs and a large pillow that can also be used as a table topper. Stars are one of my favorite shapes, so I had fun making these items up.
Here are the directions:
Materials needed are one charm square or 5" square of a star fabric.
One fat eighth of a small white on white patriotic print.
One fat eighth of a patriotic red fabric.
A piece of batting about 10" by 10"
You will use the charm square as is, cut two strips of the white fabric 1 1/2" by 5 1/4" and 1 1/2" by 9 1/4".
From the red fabric cut three 1 1/2" by 5 1/4" and two 1 1/2" by 9 1/4". These will be trimmed down to size after you get everything sewn together.
Sew the shorter strips together, using a 1/4" seam allowance. Now sew these strips to the right side of the charm square.
Next sew the longer strips together and then sew these to the top portion. This is where you will want to square your flag up to about 8 1/2" by 9", or what looks good to you. Choose one of your left- over fabrics for your backing about 1/2" larger and layer your pieces in this order: from bottom up. batting, backing face up and then your top face down. Pin or wonder clip together and sew around perimeter with a 1/4" seam allowance, leaving an opening for turning. Turn, push out your corners and press. Sew 1/4"all around your flag. You may want to go back, and hand sew where you're opening for turning was. All done, enjoy!
I have been working on my red work counted cross stitch sampler. The pattern is a free one from Black Bird Designs. This is the first sampler that I have made so it is worked on a piece of 14 ct aida cloth that I tea died. I am anxious to start on my next sampler which will be on linen.
As you can see I am not quite done stitching this. Just need to finish the border. Since I worked this on aida cloth I had to adjust the bottom a bit. Can't wait to get this finished and framed.
I have a few more finishes that I will share with you next time.
It is very HOT here in Kansas, so it is a good time to stay inside and work on sewing and stitching. Hope you-all are having a great summer.
Blessing to you all!


